Planning an interactive model is a fundamental piece of the UI and UX configuration process. It is viewed as a primer intelligent example of the thought before it turns into a total item, filling in as an extension between the plan stage and the eventual outcome.
What is a Clickable Prototype?
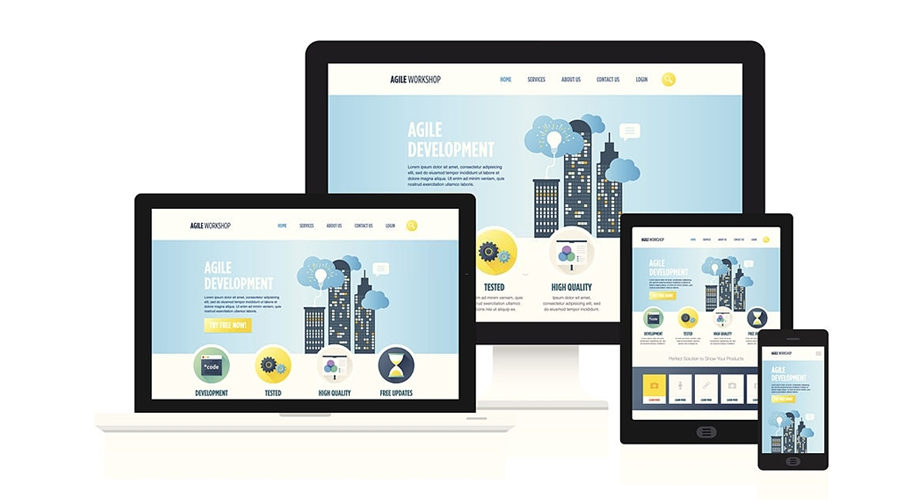
At the earliest reference point, I should clarify that neither a wireframe nor a visual mockup can be known as an interactive model. Anything static isn’t a model. An interactive model is a high-loyalty configuration model made in a plan instrument like Mockplus. After the making of the mockup, areas of interest (or interactive regions) are applied to explicit focuses on the screen/page, setting off a change to another screen/page – a capacity that emulates truly advanced items. It can plainly show a visual portrayal of the UI of a site or programming application and offers an intuitive encounter basically the same as a concluded application.
For what reason is it Important to Create a Clickable Prototype?
An interactive model isn’t just significant for the item proprietors yet in addition huge for the customers or partners, since they here and there need to settle on certain choices, like supporting the plan, the format and the usefulness before the execution. Additionally, an interactive model can assist the improvement with joining to get a reasonable viewpoint on what must be worked before they begin chipping away at the item usefulness. Hence, it’s vital to make an interactive model for the accompanying reasons:
i) For item proprietors or chiefs, interactive models can assist with creating support, gain arrangement or even speculation for the undertaking.
ii) For designers, an interactive model can assist with overcoming any issues among engineers and item proprietors or UX specialists.
iii) For end clients, utilizing an interactive model can allow them to acknowledge and affirm what they need and furthermore help to forestall radical late changes or even dismissal of the finished item.
More or less, utilizing an interactive model can make the product improvement process quicker and more financially savvy. Consequently, the most legitimate contention regarding the reason why we want to have an interactive model is limiting squandered exertion on undesirable usefulness, and simultaneously, accomplishing greatest effectiveness and quality.
How to make an interactive model?
Presently we know precisely what an interactive model is and why it’s so significant and important. There’s just something single left to do: make your own.
Here are a few pointers that will help you en route:
Put forth substantial objectives. You really want to have an unmistakable thought regarding what you need your model to achieve. At the end of the day, what are you searching for when testing your model? Make sure to focus on the client’s necessities and consistently recall the issue explanation.
Use layouts. It is superfluous to work from sratch, on the grounds that there is an immense arrangement of formats for various ventures. You can choose the right layouts, alter them, and make models rapidly and effectively, which assists you with saving a great deal of time from beginning without any preparation.
Pick the right device. With the over-burden of as of now accessible plan and prototyping apparatuses, it is hard to track down the one that meets your requirements. Relax, we’re here to help you. In this article, we’ll investigate one of the most amazing plan apparatuses Mockplus-to assist you with making an interactive model effectively and productively.
Make a move. Configuration believing is tied in with producing thoughts and testing them, so make models when you really want them. You ought to consistently remember that the course of configuration believing isn’t totally straight, so you can make a model whenever.
The Best Tool for Creating a Clickable Prototype
An interactive model not just addresses the visual format of an advanced connection point yet in addition offers a specific level of intuitiveness. In addition, it incorporates things like picture and text placeholders along with buttons and navigational components. Notwithstanding, getting the right interactive prototyping device is the most critical stage and ought not be underestimated. In the event that you have been searching for the best instrument to make interactive models, then, at that point, this article is your home. In this part, we will give you an itemized guide on the best way to make interactive models for your venture with one of the most mind-blowing plan instruments – Mockplus RP.
Mockplus Dashboard
Mockplus is a simple to-utilize plan stage, which gives a gigantic arrangement of plan symbols and layouts that can be altered and shared and reused. It gives your group a basic method for making and test interactive models. It permits you to handily change from Design to Prototype mode in a tick, and afterward drag wires between artboards/pages/parts to transform your wireframes into intuitive models right away. More than that, the stage usefulness covers the entire course of item improvement, from ideation to execution. Mockplus’ continuous cooperative climate implies that your colleagues can chip away at interactive highlights all the while.
Highlights:
Quick prototyping – it is a lightweight prototyping apparatus and you can essentially relocate parts to finish a plan.
Huge loads of pre-planned parts – it offers 3,000 symbols and almost 200 parts for you to utilize straightforwardly.
Intuitive and enlivened prototyping – it permits you to make intelligent motions and numerous sorts of activitys (Artboard collaborations, Component communications, State cooperations and Page associations).
The component of Connect Mode – it permits you to make a flowchart rapidly and without any problem.
Prototyping on the cloud – it is a cloud-based prototyping device that empowers you to make, alter, offer, test, and handoff on the cloud.
The most effective method to Create a Clickable Prototype with Mockplus Faster and Easier ?
Here is the nitty gritty manual for making an interactive model bit by bit:
Step 1. Create a new Project

Step 1
Visit the Mockplus website and log in with your credentials. When the main interface is displayed, hit the “New” button, and then you can select a specific device by selecting the options provided under the device drop-down icon. As for creating a clickable prototype, you can choose “Online prototyping” to get started.
Step 2. Add new page for your clickable prototype
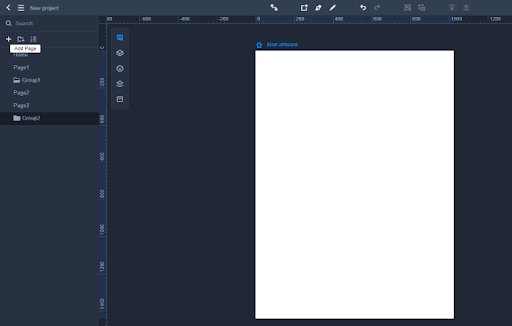
Step 2
Now the project will display a prototyping window. To make it clickable, you should add more pages so that they can be linked with objects of different pages. To add pages, click the “+” button at the top right corner. Add as many pages as defined by the nature of your project.
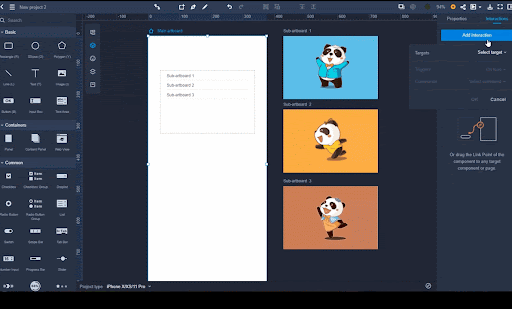
Step 3. Add components and icons to the clickable prototype
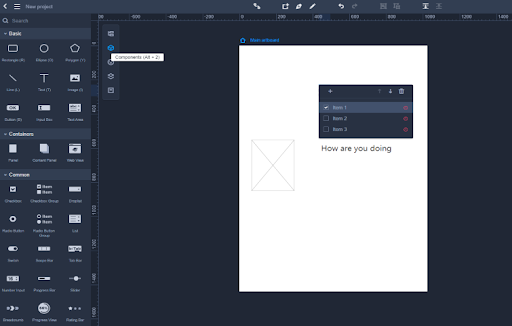
Step 3
Once you have added the target number of pages, you can add the page objects you need, such as buttons, text fields, which shall be used for interaction. Drag the components into the Artboard and begin drawing your shapes. Tons of Built-in Components and Icons are offered, which can make your design faster and easier. You can edit these Components and save them to your asset library so that you can reuse them the next time you require them. Another specific feature is that you can share your asset library with your team members and thus these Components can be reused by them quickly, which helps to improve the work efficiency of the whole team.
Step 4. Create object and page interaction
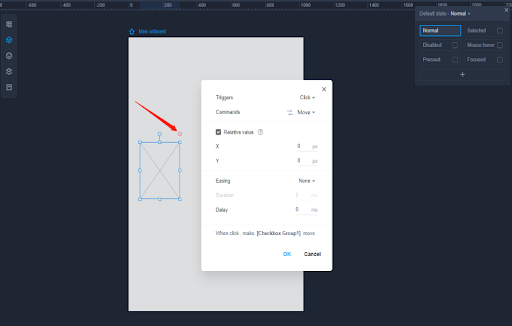
Step 4
The centerpiece of the connection is connecting your pages and articles. When your configuration is finished and good, click on the page article and drag the connection point that shows up on the right half of the item. Drag it to the individual page that the article should interface. Additionally, Mockplus offers Page cooperations, yet in addition offers Component connections, State associations and Artboard collaborations, making it one of the most mind-blowing plan devices among item fashioners and UI/UX creators.
Step 5. Preview the clickable prototype project
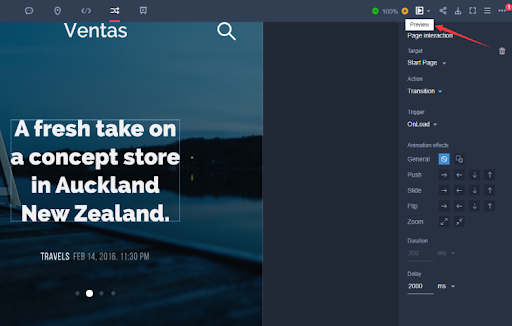
Step 5
Since you are finished with the association, the time has come to review what you have done. Basically hit on the “See” tab and cooperate with your model. You can likewise download a HTML model from Mockplus RP, which can be saw disconnected.
By following the above advances, you can rapidly make an interactive model. Then, at that point, you can furnish clients and different partners with a ‘working’ model that empowers them to navigate a progression of pages, which is very helpful for driving plan discussions, empowering you to edge your configuration forward through conversation.
How to Make Eye-popping Transitions
Benefits of Clickable Prototypes
Creating a clickable prototype that shows the features and functionality of an app/a website in development can certainly make an impact on the final design as well as on the whole project. Here are some major benefits showing how clickable prototypes can help your design idea.
Saving a great amount of money. A clickable prototype allows users and stakeholders to see where they might have problems with their design in the early stages of the project, and can identify necessary features to save money. When problems arise, it is more cost-effective to fix them with prototypes than to continue the development process.
Allowing users to provide valuable feedback. A clickable prototype allows users and stakeholders to use the entire application scenario in the right context to provide timely and valuable feedback, rather than requiring changes after the project implementation is complete.
Acting as a useful reference tool for developers. Clickable prototypes can illustrate functionality in ways that screen specs cannot. For example, if developers need to figure out how a particular component or control works, they can use prototypes to answer functionality questions.
Saving a lot of development time. It can be costly for developers to recode a website or application usability issues after production. Thus it is recommended to create prototypes at earlier project stages considering user’s feedback which is much simpler and helps reduce overall development time.
Testing in the real world. The most beneficial aspect of an interactive prototype is the ability to test it on a target device using an actual working setting. Allowing developers to test the UI on devices in the real world will ensure they have better feedback on what works and what can be improved.