When you need to quickly operate with several tiers and regions, you need a detailed strategy for countries on Facebook.
This article will talk about ways to add countries to the advertising cabinet and about effective tools for working with shooting ranges that save time.
GEO
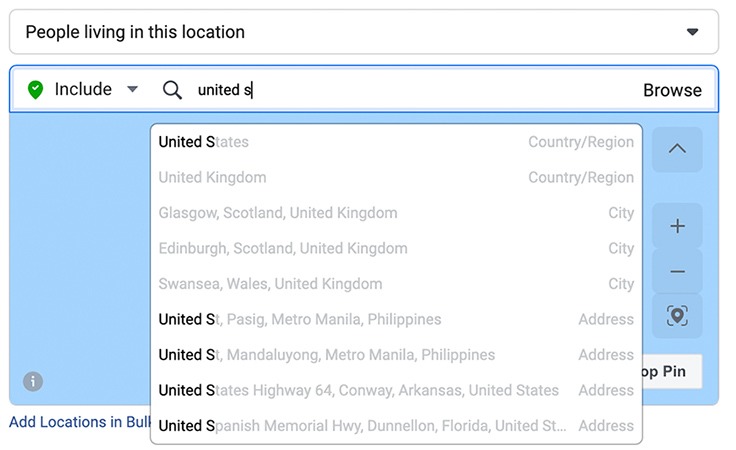
At the stage of creating an ad-set, the question of choosing countries appears. You can select countries from the list or search for locations by entering them in the search bar.

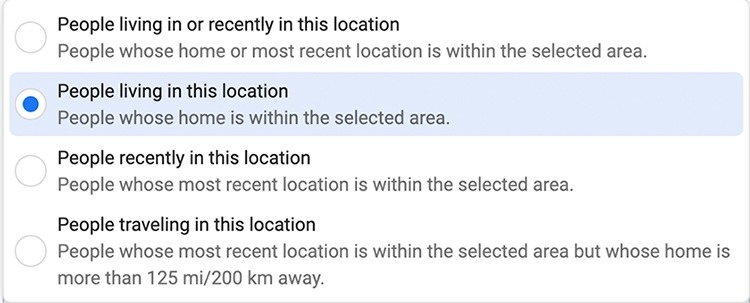
We can also choose which people from this location we will show ads for. Facebook offers 4 options for this:
People living in this location
People in this location
People in or living in this location
People traveling to this place (travel is a place that is 125 mi / 200 km away from home)
The reasonable question is: How does Facebook determine which location is considered the user’s home?
The answer is: Facebook uses multiple signals to determine (or more realistically, to estimate) a user’s location. The platform may use IP address, mobile device info, a user’s profile data (i.e. city listed in their profile), and sometimes a combination. They can also use info from the locations of the Facebook user’s friends.
GEO Lists
Imagine that you have 20 GEOs (in a 2-letter designation), broken down by tiers (5 GEOs in each tier). Your task is to launch campaigns on all 4 tiers. How to do it in a short time? Easy!
First, you need to translate the 2-letter designation into the full name of the country.
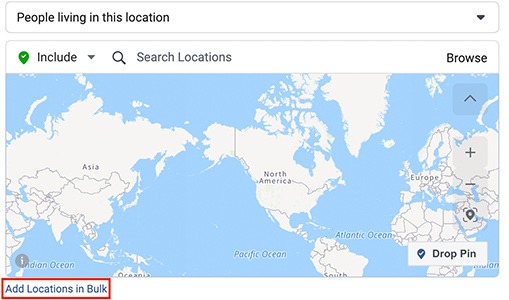
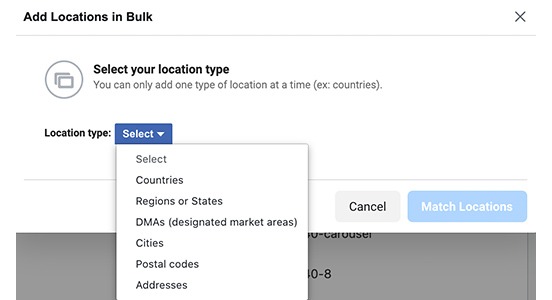
After you collect the full country names, start uploading them to Facebook using bulk upload. To do this, in the Locations section, click “Add Locations in Bulk”
In the window that appears, there are several options for loading locations:
Country
Regions or states
DMAs (designated market areas)
Cities
Postal codes
Addresses
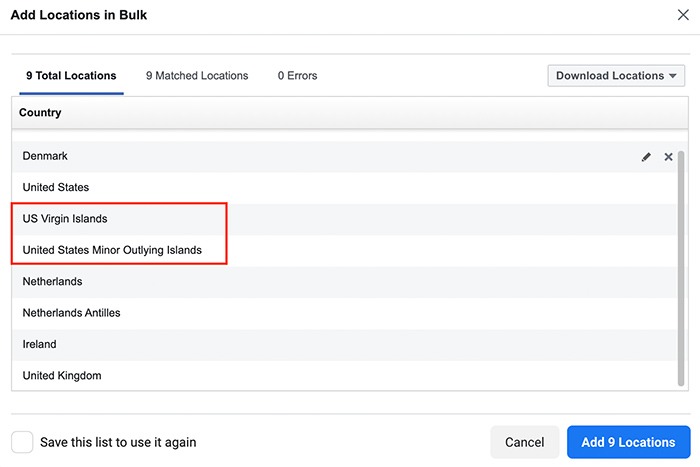
Initially, there were 5 countries in this tier, but after the match, Facebook shows that it found 9 countries. The reason for the increase in the number of states is because Facebook indicates all the possible options for countries associated with the list.
In the present case, for the United States, US Virgin Islands and the United States Minor Outlying Islands were found. These countries are removed from the ad.
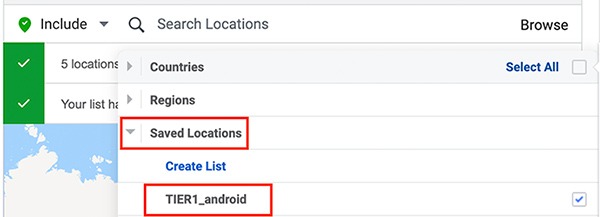
After removal, click on the field next to Save this list to use it again. Thus, this list of countries is saved for future work. This is useful when multiple UA managers work in the same office. They will not have to download the list of countries several times, but just select it in the saved audiences.
In the example, the list is called TIER1_android. Now, creating an ad-set from scratch, we can select this list of countries here:
In a similar way, we create country lists for all tiers. As a result, all country groups load ad sets with the click of a button.
Country lists are easy to edit. To do this, you need to move the mouse over the saved audience, after which the Edit button appears.
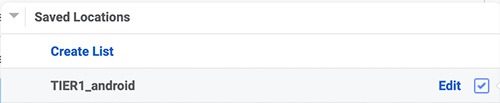
By clicking on it and adding the countries again, Facebook will produce a match. The next step is to delete unnecessary countries and save the list again.
Workflow With Saved Audiences
All audience settings can be saved in custom audience. The saved audience contains the parameters of social demography, geography, connection and include/exclude audiences. This useful tool allows you to quickly change countries in tiers in work campaigns.
After creating the campaigns, dividing by tiers, we launch them, and after 10 days our LTV is updated. Tier-1 included Holland, on which LTV fell, and now it should be transferred to Tier-2. The challenge is to quickly change the countries of Tier-1 and Tier-2.
Creating the Saved Audiences
To create a saved audience, open the ad-set settings. In the Audiences section, click on the Save This Audience button, come up with the name of the audience (in our case TIER1_android_broad) and save it.
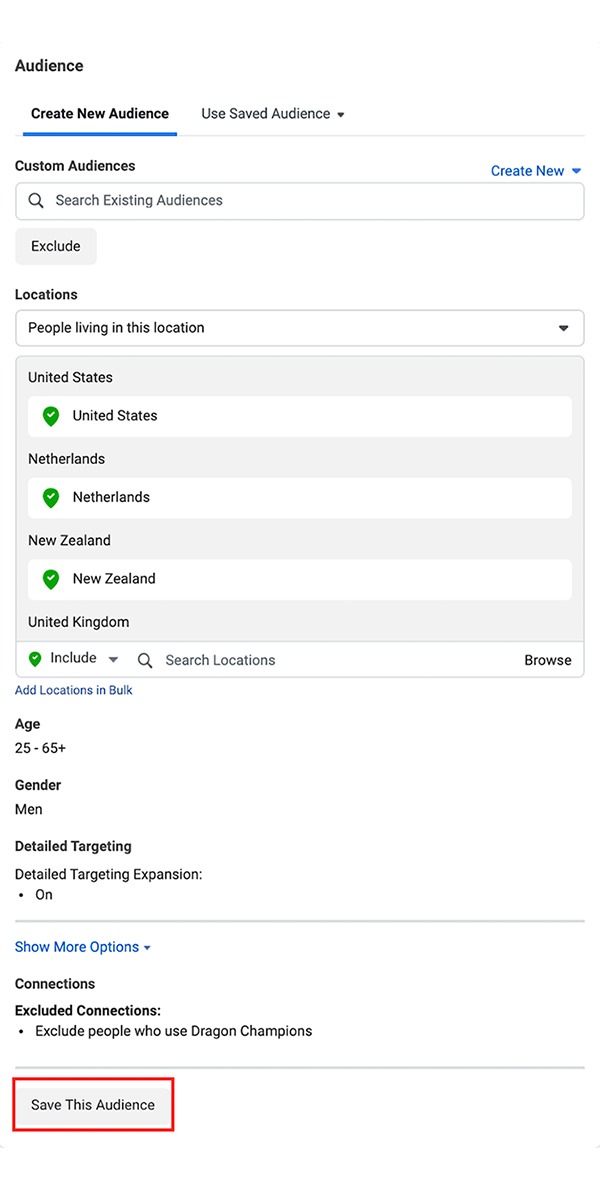
Now the audience section in the ad-set looks like this:
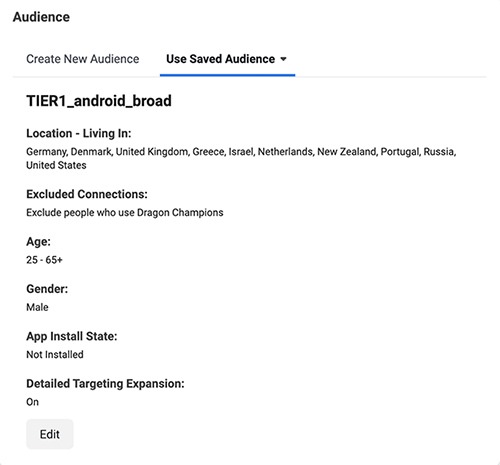
Now you need all ad sets to use your saved audiences. To do this, select all Tier-1 ad sets and select our audience from the saved ones.
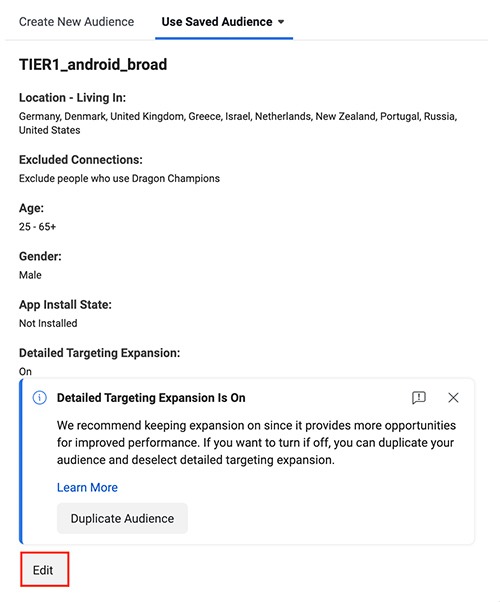
Editing the Saved Audience
Imagine that we have 20 ad sets with a saved audience TIER1_android_broad. We need to remove Holland from it. To do this, we select the ad-set with the saved audience and click edit.
In the window that opens, we can change all the parameters of the audience we are aiming at. We remove the Netherlands and click Update:
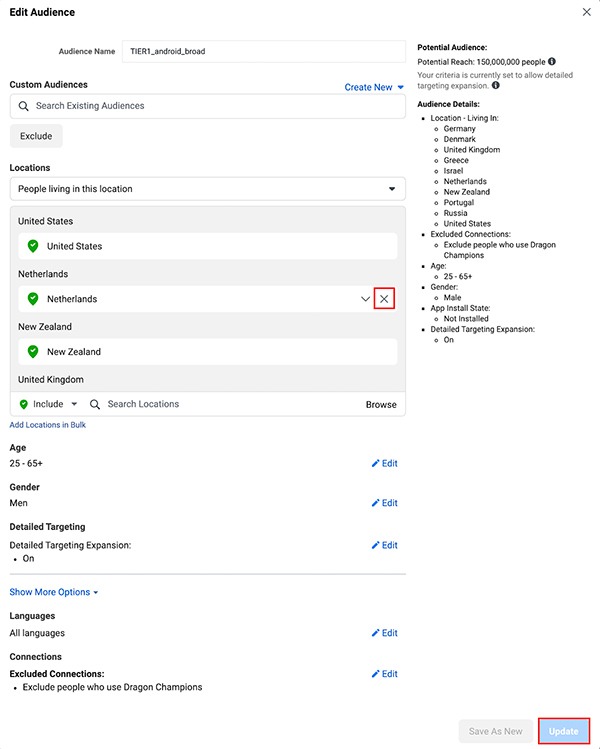
After that, we receive a notification about the change in the saved audience.
In addition to changes in the ad set itself, the audience will also be updated in ad sets using this saved audience. That is, Holland will be removed from the campaigns in all 20 ad sets, although only one has been changed.
This method has limitations. If the same saved audience will be used by more than 200 ad sets, then when changing the audience, Facebook may not allow you to do this, referring to the fact that not all ad sets have changed the audience. The solution is simple – create a new saved audience and select it in all working ad sets.